I have decided to try and resume a blogging life once again. After a lot of changes of job duties, laptops (thankfully I have one that actually operates now),and a health scare I want to put creativity back into the life mix.
After having most of the summer off following surgery, I put together a little list of things that happened over those couple months:
Summer 2014:
*Spent time with the family ( when they could be dragged away from their own personal inclinations/electronic devices
*One expensive van repair
*Two new car windshields
*One new dryer
*A new air conditioner
*One new permitted driver in the family
*Two children's birthdays
*1500 photos printed (they no longer reside only on my flash cards)
*Read and dumped over 6 bags of magazines
*One Broadway show:The Lion King (we could most definitely feel the love tonight with front row seats)
*One week in the Outer Banks which has become one of my favorite places to just be totally chill
*Saw three lighthouses and climbed the tallest on the East Coast
*Actually drove on the beach ( thought we would be stuck there for a minute or two)
*Saw the Corolla wild Mustangs
*One visit to the National Gallery of Art ( Degas, Cassat, Titian, Rembrandt, Picasso and a Leonardo (Davinci) not mutant turtle
*One blockbuster - Dawn of the Planet of the Apes (how I do love Andy Serkis)
*Two Seasons of Game of Thrones
*Season 4 of Downton Abbey
*Readying myself to say goodbye to True Blood....I love you Pam and Eric....how will I go on without you?
*renewed my love of scrapbooking- actually finished 20 scrapbooking pages
*and maybe the biggest accomplishment.... I didn't buy a single piece of clothing for 8 weeks ( working retail, this is a personal best.....don't even bring up the fact that I didn't go to work for 8 weeks....it STILL counts! )
I have begun many new art ventures in the last 18 months and hope to explore my new path here in the coming days.
Monday, August 18, 2014

Saturday, November 10, 2012
teacher card
Here is a little holiday card for my daughter to give to her teacher this Christmas.


recipe: White cardstock embossed with Tim Holtz snowman texture fade. I used tumbled glass, stormy sky and salty ocean distress ink on the inside of the embossing folder to add the color to the background before embossing, snowflakes from Texture fades and the small metallic star is cut from Ranger metallic foil sheet using a cuttlebug snowflake#2 die, warmest wishes sentiment and tiny trees from Hero arts and I heart my teacher sentiment from Create Your classroom stamped with archival ink and heart filled in with dimensional pearls in cranberry, snowman glittered with Sparkles in Diamond.
Don't forget those teachers at holiday time. They do so much for our children all year long and they deserve a little spoiling at the holidays. Visit Wendy's site, the button on the right will take you there and you can find her fun stamps and get some great classroom ideas.


recipe: White cardstock embossed with Tim Holtz snowman texture fade. I used tumbled glass, stormy sky and salty ocean distress ink on the inside of the embossing folder to add the color to the background before embossing, snowflakes from Texture fades and the small metallic star is cut from Ranger metallic foil sheet using a cuttlebug snowflake#2 die, warmest wishes sentiment and tiny trees from Hero arts and I heart my teacher sentiment from Create Your classroom stamped with archival ink and heart filled in with dimensional pearls in cranberry, snowman glittered with Sparkles in Diamond.
Don't forget those teachers at holiday time. They do so much for our children all year long and they deserve a little spoiling at the holidays. Visit Wendy's site, the button on the right will take you there and you can find her fun stamps and get some great classroom ideas.
Wednesday, October 17, 2012
School work file folder
Here is the latest project I did for my wonderful friend Wendy http://www.createyourclassroom.com using her first stamp release. We were challenged to think out of the box, so here is what I came up with.


recipe:I just took a regular old file folder from Staples, painted the edges with Chili powder paint dabber from Jenni Bowlin, and Espresso paint dabber from Ranger, covered the front with paper from DCWV, Heirloom pack, stamped learning is the key from Create your Classroom and die cut a key from Cricut cartridge Sentimentals. Key painted with gold metallic Adirondack paint dabber and popped up with pop dots.
Please go on over to Wendy's website and check out her wonderful stamp set!


recipe:I just took a regular old file folder from Staples, painted the edges with Chili powder paint dabber from Jenni Bowlin, and Espresso paint dabber from Ranger, covered the front with paper from DCWV, Heirloom pack, stamped learning is the key from Create your Classroom and die cut a key from Cricut cartridge Sentimentals. Key painted with gold metallic Adirondack paint dabber and popped up with pop dots.
Please go on over to Wendy's website and check out her wonderful stamp set!
Saturday, June 30, 2012
Turning 17
Today is the birthday of #2. My only son and second eldest child is turning 17. Since springtime , I have had several moments of freaking out. Usually when I utter words like, my oldest will be turning 20 in November.... I swear my throat tightened up as those words were coming out.... This next bit sends me into another tailspin.... My son is entering his senior year and he... is... 17!
Here is the card I created for him.
 Recipe:paper:DCWV, Dylusions spray ink and alpha stencil,Chicken wire stamp Christy Tomlinson, Distress ink and playing cards from Tim Holtz, Dymo label maker for lucky, homemade stencil with circular design
Happy birthday, #2!
Recipe:paper:DCWV, Dylusions spray ink and alpha stencil,Chicken wire stamp Christy Tomlinson, Distress ink and playing cards from Tim Holtz, Dymo label maker for lucky, homemade stencil with circular design
Happy birthday, #2!

Saturday, March 31, 2012
March 12 tags of 2012

March's tag included a pretty cool mosaic technique. I didn't have the exact supplies Tim used, so I just used what I did have to get the same kind of feel. The background was stamped with stamps by Dyan Reaveley , Ranger's newest signature designer http://www.dyan-reaveley.blogspot.com/, and my latest obsession. The mosaic pieces were sprayed with Dylusions spray inks http://rangerink.com/, glued down and remaining area embossed.
This was just a first attempt, so I think once I can play with the technique, I'll be happier with the results.
recipe: Adirondack ink pad, clover, archival ink jet black, Dylusions stamps, Tim Holtz sentiment stamp, Tim Holtz flower die, distress marker black soot around flower edge,sakura clear star pen
Wednesday, February 29, 2012
12 tags of 2012
New, fun monthly project from Tim Holtz http:www.timholtz.typepad.com. Discontinuing the 12 tags of Christmas (insert sad face here), but here is the birth of a brand new project ( happyface). A new tag every month.... I like this.... spreading out the fun over the course of the year . Had to spend some time and add my own tag....


Tag stamped with snow cap Adirondack paint, barn door and fired brick distress ink, tim holtz tissue paper tape, pom pom made from plain tissue paper sprayed with Dylusions spray ink, safety pin with seed beads, Tim Holtz word, and Maya Road crystal. Phrase Tim Holtz seasonal paper pack.
Friday, April 8, 2011
Happy birthday to me.....
Hooray! Hooray! Hooray! After a year of wanting, wishing and drooling, look what I received for my birthday this year. Da da da.... Tim Holtz's dream machine, the Vagabond. I fell in love with this cute suitcase, all ready for travel and ready to fulfill all my cutting and embossing needs. Let me tell you this baby is a powerhouse. I have cut out grungeboard and soda cans like running a knife through room temperature butter . Embossing with Tim's texture fades gives a gorgeous, deep, beautiful embossed image. I am in love with this machine! I am working on a special birthday card with the birdcage die, will post that when it is finished.


And, of course, because all occasions call for cake, here is a photo of my birthday cupcakes complete with butterfly rings as decorations.

Saturday, February 26, 2011
Coffee and cream

Here is my submission for this week's challenge over at SimonSaysStamp.com. The challenge was to use the colors of coffee and cream.... and it dawned on me that maybe the reason I crave coffee so much is that it really is the color of CHOCOLATE ! What could be better than that?
Ingredients: DCWV paper from the At Home collection,Technique Tuesday paisley stamp and life sentiment,Celebrate stamp by Autumn Leaves, dragonfly by Inkadinkado, all inks by Color Box, glossy accents on dragonfly, Tim Holtz flowers, assorted gems
Wednesday, February 23, 2011
This makes me ridiculously happy

had a lovely sale. Lots of Cricut cartridges on sale for $15.95 and others for $17.95.... couldn't help myself....a few older cartridges I have been wanting..... Now, I get to pour over the little books that come with the cartridges (one of my favorite things) then it is on to cutting and layering. I am really loving the looks of Rock Princess so far....so fun!
Friday, February 18, 2011
wish me luck
In January, I was inspired to resume journaling as a daily activity. I used to be a devoted journaler but life, children and seemingly the loss of the written word dulled my resolve to document life's daily events.
I found a journaling primer here : http://www.chookoolonks.com/blog that freed me from my conventional ideas about documenting....I was inspired enough to start looking at other journals. art journals... then I found : http://www.violette.ca WOW! I had been missing out on an entirely different experience....I was never an art student, but she made me wish I were one.....
I have been journaling since the new year and today...... I bought....gulp.... an honest to goodness, 11x14 inch art sketch book....it is a bit intimidating to look at but I hope to fill it with....yes....ART! Art of my own....wish me luck in my new adventures.....
I found a journaling primer here : http://www.chookoolonks.com/blog that freed me from my conventional ideas about documenting....I was inspired enough to start looking at other journals. art journals... then I found : http://www.violette.ca WOW! I had been missing out on an entirely different experience....I was never an art student, but she made me wish I were one.....
I have been journaling since the new year and today...... I bought....gulp.... an honest to goodness, 11x14 inch art sketch book....it is a bit intimidating to look at but I hope to fill it with....yes....ART! Art of my own....wish me luck in my new adventures.....
Wednesday, February 16, 2011
Valentine goodies
A bit late, but here is the little goodie bag I put together for my children for Valentine's day. Purchased cellophane treat bags filled with Hershey chocolates, chocolate covered fortune cookies, chocolate cherry bark, and white chocolate covered pretzels. Then to jazz it up a bit, I put together a few hearts cut out on my Cricut Expression, taped them to a lollipop stick and used my Martha Stewart fringe scissors to cut a band of silver metallic paper to create the streamer effect. I think they came out pretty darn cute! The idea could translate to many holidays or occasions... little bears for a baby shower, bunnies or eggs for Easter, stars for the 4th of July etc.


Wednesday, February 9, 2011
Polar bears and winter...
Life, computer woes and just plain old lack of motivation has made this the first blog post of the year.
My youngest turned 9 last month but didn't have her party until last weekend. So naturally, I made.....yeah....cake....and not just any old cake ( although nothing wrong with that in my cupcake book)....but very, very special ( the kind that always leave me wondering why I thought it would be a good idea to make ) polar bear cupcakes from What's New Cupcake by Karen Tack and Alan Richardson , check it out here: http://www.hellocupcakebook.com/ .
My 12 year old and I spent about four hours decorating these little beauties after which at least a third of the children wouldn't eat ( including the party girl herself) because they have coconut fur.....AUGH! I reminded my daughter, that she does indeed like coconut....she still doesn't believe me.... oh well....more bears for me....
I apologize for the poor quality of the lighting....I couldn't get it right....

My youngest turned 9 last month but didn't have her party until last weekend. So naturally, I made.....yeah....cake....and not just any old cake ( although nothing wrong with that in my cupcake book)....but very, very special ( the kind that always leave me wondering why I thought it would be a good idea to make ) polar bear cupcakes from What's New Cupcake by Karen Tack and Alan Richardson , check it out here: http://www.hellocupcakebook.com/ .
My 12 year old and I spent about four hours decorating these little beauties after which at least a third of the children wouldn't eat ( including the party girl herself) because they have coconut fur.....AUGH! I reminded my daughter, that she does indeed like coconut....she still doesn't believe me.... oh well....more bears for me....
I apologize for the poor quality of the lighting....I couldn't get it right....

Saturday, October 30, 2010
A great day in October (part 1 )
Two weeks ago, my friend and I had the privilege of taking classes from the wonderful and talented Wendy Vecchi of Studio 490 fame. Please, if you are unfamiliar with Wendy , Stampers Anonymous or Ranger Ink products...run....do not walk to her website at : http://studio490art.blogspot.com you will be amazed at the creative mind that is Wendy Vecchi. I have been following her blog for quite awhile now and could not wait to sign up for classes at the Queen's Ink : http://www.queensink.com in Savage Maryland. We have no local scrapbooking stores, only chain craft stores so it is quite the treat to visit such a beautiful store that is literally packed to the rafters with treats for the eye as well as every supply needed to carry out any artistic vision. Love the people, love the store... LOVE this hobby.
We signed up to take two classes. The first, a great tag book of techniques.We inked and stamped and perfect pearled our way through four hours of FUN and had some great tags with descriptions of the technique so that we will always know how we made that cool effect.
The second class was a home art piece showcasing Wendy's new line of art parts. This four hour class was smaller and more relaxed. We had lots of stories and laughs shared during these four hours. Not to mention really cool art at the end.
I will post those projects another time. For now, I wanted to get the photos of her art, and class time and a couple very special photos with her onto this blog for your viewing pleasure.


Wendy was just as cool in person as she appears on her blog. She was very gracious, and fun, sharing some funny stories of her work and a little bit of her personal life with us. I was really thrilled when we went up to say hello and she asked me if I was pixiedust ( my online moniker) from the blog. " Yes" I must have squealed and she gave me a big ole hug. Now that is someone who really does take the time to read her blog comments. It made my day !
We signed up to take two classes. The first, a great tag book of techniques.We inked and stamped and perfect pearled our way through four hours of FUN and had some great tags with descriptions of the technique so that we will always know how we made that cool effect.
The second class was a home art piece showcasing Wendy's new line of art parts. This four hour class was smaller and more relaxed. We had lots of stories and laughs shared during these four hours. Not to mention really cool art at the end.
I will post those projects another time. For now, I wanted to get the photos of her art, and class time and a couple very special photos with her onto this blog for your viewing pleasure.
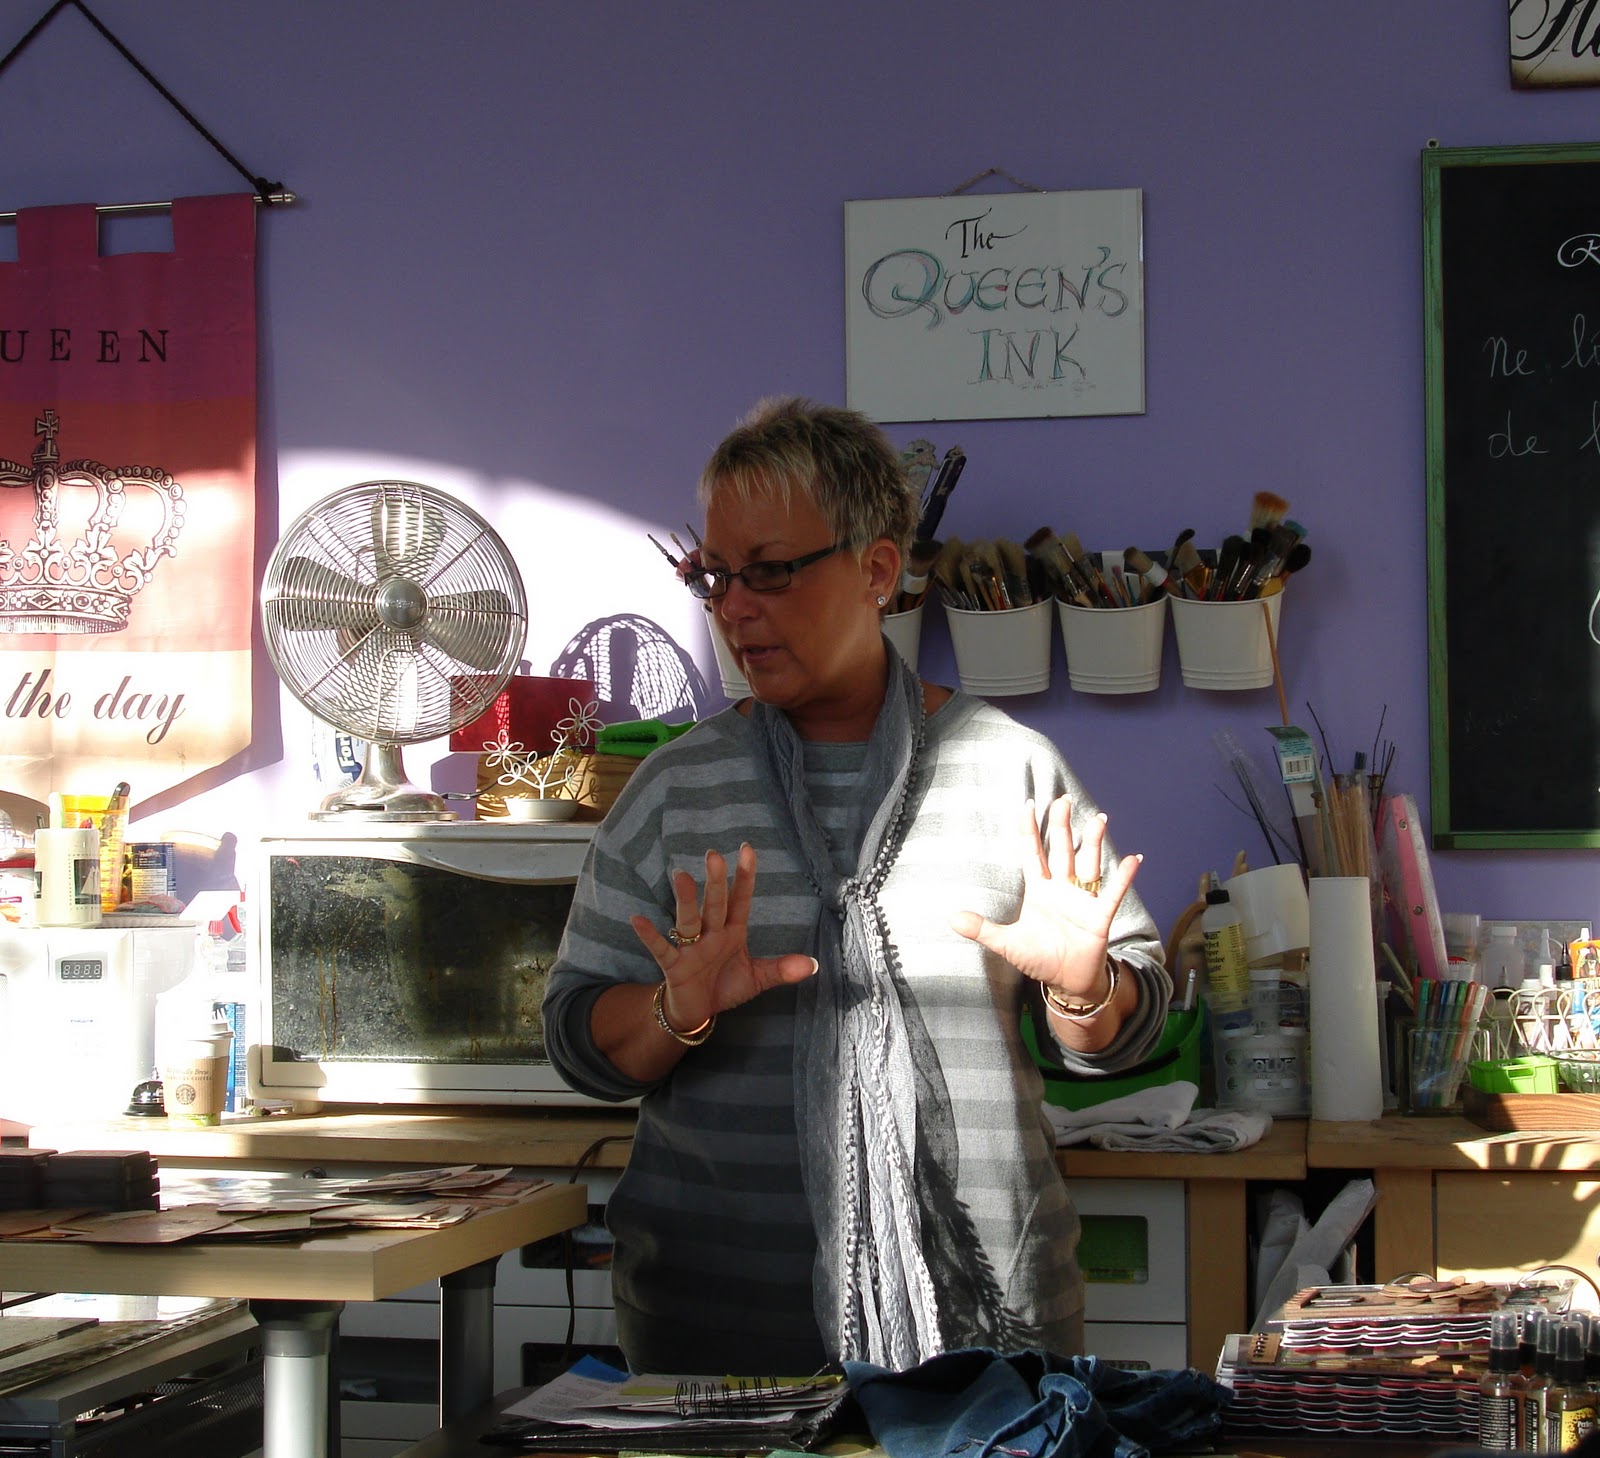


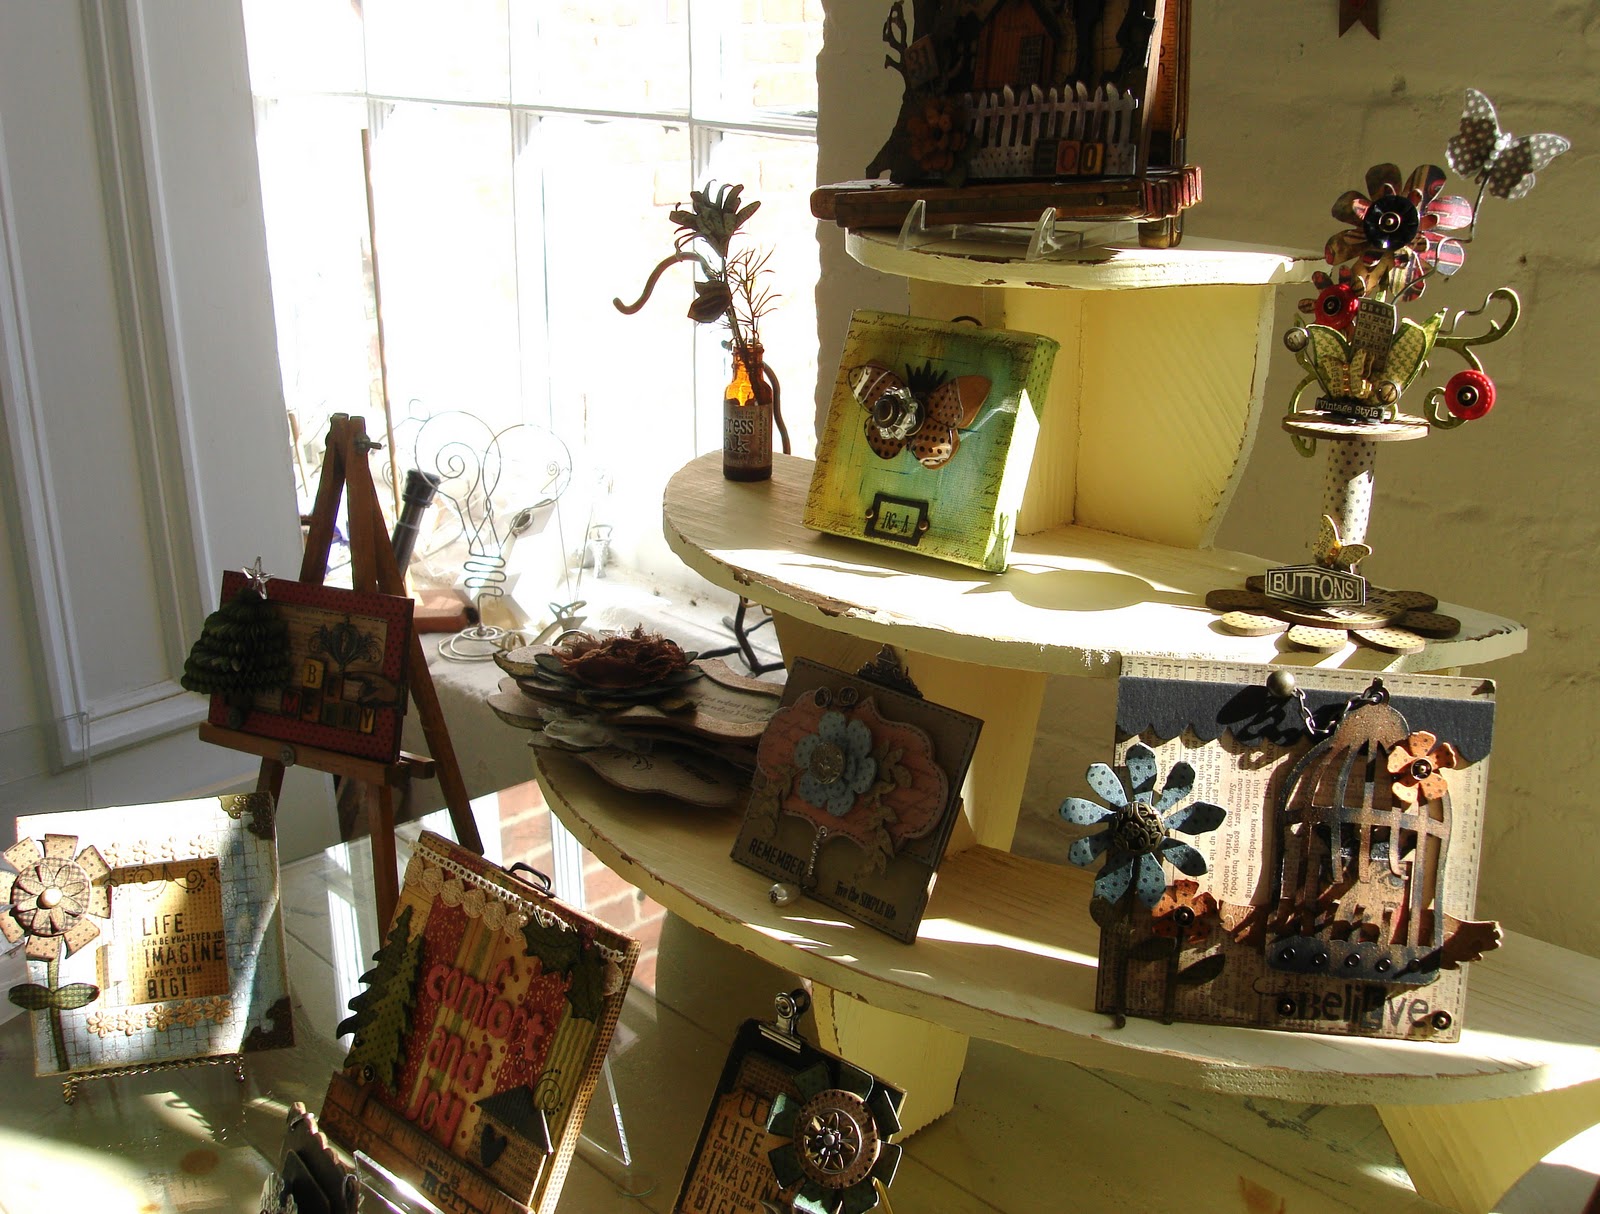


Here is my friend Wendy ( and partner in scrapping crime), Wendy Vecchi and myself
Halloween treat
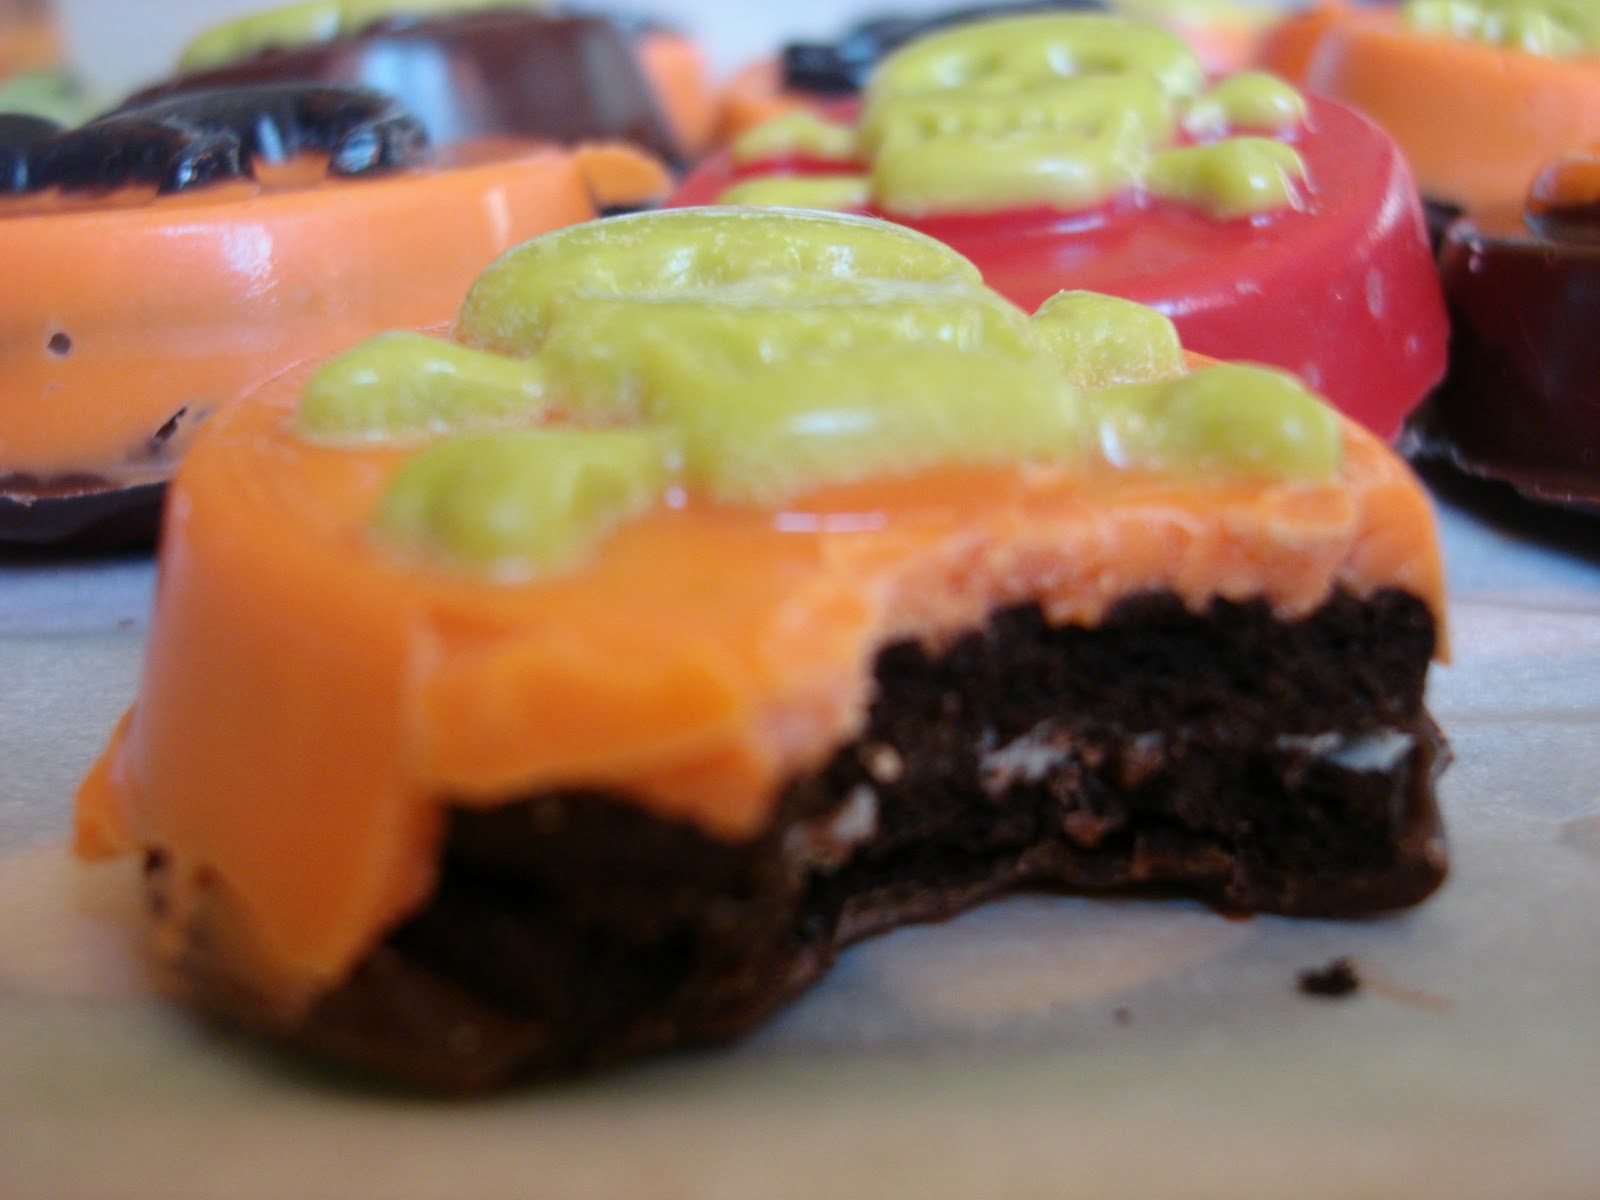
Wilton makes the coolest things....don't you think? Here they have done it again and made these great molds for Halloween....but these are not just mere candy molds...oh no... not at all.... for they contain something very special indeed....in the middle of all that candy coating... is a .... wait for it.....
oreo cookie. Hallelujah.... one more way to get the wonderful chocolate sandwich cookie filled with creme all dressed up for trick or treating....
I'm sorry the photos are so poor.... I couldn't seem to get a decent one....by the time I noticed that they were blurry and glaring....well..... there weren't enough to photograph properly....but aren't you glad SOMEONE thought to take a bite out...ahem....to show you the inside of the cookie?


oreo cookie. Hallelujah.... one more way to get the wonderful chocolate sandwich cookie filled with creme all dressed up for trick or treating....
I'm sorry the photos are so poor.... I couldn't seem to get a decent one....by the time I noticed that they were blurry and glaring....well..... there weren't enough to photograph properly....but aren't you glad SOMEONE thought to take a bite out...ahem....to show you the inside of the cookie?

Wednesday, October 13, 2010
Quick Halloween tag
Halloween is rapidly approaching. EEEKKKKK! Scary! I have tons of Halloween decorations that have yet to make their yearly appearance. I am behind...as usual...but I did carve out some time to play with the new Martha Stewart clear stamps.
Background inked with distress inks of mustard seed, dried marigold,wild honey and spiced marmalade. Images stamped with Ranger black archival ink and a little black diamond stickles added the glitz. Black ribbon from Michaels.

Background inked with distress inks of mustard seed, dried marigold,wild honey and spiced marmalade. Images stamped with Ranger black archival ink and a little black diamond stickles added the glitz. Black ribbon from Michaels.

Tuesday, October 5, 2010
M.I.A.
Well, the start of the school year, a new job, soccer season, and computer problems have all led to a decidedly serious lack of posts... not that I have had much time for creativity....
But....things are changing.... at least creatively.... I have done four scrapbook pages and two cards in the last few days.... YAY me!..... but... what I would like to show you is my youngest child's collage done for school as a way of introducing herself to her classmates and teacher. She could have done a regular old poster, but I thought it might be fun to give her a canvas and let her roll with it .

Canvas background - Tattered Angels glimmer mists, soccer ball- Cricut soccer cartridge, butterfly- Martha Stewart punch, Recollections pearls, Alphabet, dollar store, paper rosette done with Martha Stewart score board and topped with a button.
But....things are changing.... at least creatively.... I have done four scrapbook pages and two cards in the last few days.... YAY me!..... but... what I would like to show you is my youngest child's collage done for school as a way of introducing herself to her classmates and teacher. She could have done a regular old poster, but I thought it might be fun to give her a canvas and let her roll with it .

Canvas background - Tattered Angels glimmer mists, soccer ball- Cricut soccer cartridge, butterfly- Martha Stewart punch, Recollections pearls, Alphabet, dollar store, paper rosette done with Martha Stewart score board and topped with a button.
Monday, September 6, 2010
Simon Says Stamp and Show challenge
This week the challenge over at : http://simonsaysstampandshow.blogspot.com was to create a layered piece of art. I saw this great tutorial over at Hero Arts this week and wanted to give it a try. The bag is made from.... wait for it.... an honest to goodness envelope....I know...I know.... who would have thought? Brilliant I tell you.... here is the link.... You have to see it to believe it! http://www.heroarts.com/learning/technique.cfm?techID=173


Recipe: plain white envelope inked with distress inks in Victorian velvet and tea dye.
Friends definition stamp: Hero Arts
Mini scroll : Maya Road misted with Olive Vine by Tattered Angels
Flowers: Tattered Florals by Tim Holtz
Memo Pins: Tim Holtz
Gem & Ribbon from Michaels
Tuesday, August 24, 2010
Tim inspired project
Anyone who knows me or ever glances at this blog, knows one thing about me.... I cannot...and I say this with utmost sincerity...I cannot make anything without my Tim Holtz Distress inks.... I am such a Tim Holtz website stalker....er... fan.... I have to know....what did Tim invent today? How did he know what I needed before even the tiniest seed of an idea could form in my creative brain....what new technique will make me want to smack my head because of it's simplicity but UTTER GENIUS ? I have learned so much from his products, videos and step by step instructions. He constantly inspires me to create... and to enjoy the journey....
Having recently returned from a 2 day trip to Creating Keepsakes Convention, I had a few mementos and photos that I wanted to put into a mini album.... I wish I had more photos, but my smaller and more portable digital camera, ran out of memory stick room....yes, I know, I should check these things before leaving home....but I didn't....
The idea for the book started with Tim Holtz's Alteration line- On the Edge dies. I used kraft card stock cut to approximately 5 1/2 x 12 inches and ran each short edge through the die creating the cool design on the edge. I did this 2 more times, cutting each subsequent sheet about a half inch to an inch shorter to stagger the edges to have different length. Next, I cut lengths of Tim Holtz idea-ology paper stack- RETRO GRUNGE to fit the right side of each page and ran those through the die as well. I embossed each of those cuts with Tim's Sizzix embossing folders: Notebook, Rays, Collage, Retro Circles or Cuttlebug embossing folder Seeing Spots, Divine Swirl and Spots and Dots.
I distressed each embossed sheet with either antique linen, crushed olives, tea dye, vintage photo and corduroy inks or combo of a few of those.
All stamps by ....yeah....you already know.... Tim Holtz Visual Artistry line.... French Market, Regal Flourish, Life's Possibilities, Urban Grunge, and The Journey collections.
Fun bits were added: Tim Holtz game spinners, metal flowers and words and one tiny prima flower distressed and layered in a metal flower.
The inner page flower die cut with the Tim Holtz tattered florals Alteration die and layered with more metal accessories.
Little pockets were created for tickets and tags and a few more photos and memorabilia.
Originally, I was going to just staple the book together but it became a little too bulky for that, so i just wound lots of twine around the spine to hold it together.
This tiny little book makes me happy, and reminds me of a really fun memory. That is the whole point isn't it?


Having recently returned from a 2 day trip to Creating Keepsakes Convention, I had a few mementos and photos that I wanted to put into a mini album.... I wish I had more photos, but my smaller and more portable digital camera, ran out of memory stick room....yes, I know, I should check these things before leaving home....but I didn't....
The idea for the book started with Tim Holtz's Alteration line- On the Edge dies. I used kraft card stock cut to approximately 5 1/2 x 12 inches and ran each short edge through the die creating the cool design on the edge. I did this 2 more times, cutting each subsequent sheet about a half inch to an inch shorter to stagger the edges to have different length. Next, I cut lengths of Tim Holtz idea-ology paper stack- RETRO GRUNGE to fit the right side of each page and ran those through the die as well. I embossed each of those cuts with Tim's Sizzix embossing folders: Notebook, Rays, Collage, Retro Circles or Cuttlebug embossing folder Seeing Spots, Divine Swirl and Spots and Dots.
I distressed each embossed sheet with either antique linen, crushed olives, tea dye, vintage photo and corduroy inks or combo of a few of those.
All stamps by ....yeah....you already know.... Tim Holtz Visual Artistry line.... French Market, Regal Flourish, Life's Possibilities, Urban Grunge, and The Journey collections.
Fun bits were added: Tim Holtz game spinners, metal flowers and words and one tiny prima flower distressed and layered in a metal flower.
The inner page flower die cut with the Tim Holtz tattered florals Alteration die and layered with more metal accessories.
Little pockets were created for tickets and tags and a few more photos and memorabilia.
Originally, I was going to just staple the book together but it became a little too bulky for that, so i just wound lots of twine around the spine to hold it together.
This tiny little book makes me happy, and reminds me of a really fun memory. That is the whole point isn't it?
Hope you enjoy it too!


Tuesday, August 17, 2010
Cards for Kids

Hello and welcome to the Lawn Fawn Hearts Cards for Kids Blog Hop! We have all come together today to make cards for a wonderful cause, Cards for kids : http://jennifermcguireink.typepad.com/my_weblog/we-are-collecting-cards-for-ten-children-and-their-families--kate--sami----a-few-things-to-know--this-card-drive-will-be-on.html! We hope to encourage you to also make cards for this great cause and have fun along the way, too! So please hop along with us, and make sure to leave comments as there will be prizes for commenters and participants! So let's get going! Also, if you are lost in the hop, you can always start at the beginning at the Lawn Fawn blog :http://lawnfawn.blogspot.com. Thank you so much for hopping along with us today!
Hopefully, you have arrived from Clare's blog: http://bearydocardsinc.blogspot.com/
just in time to visit with me for awhile before hopping on over to :
Grace's blog: http://gracehester.typepad.com/
Remember if you get lost in the hop, head back to lawnfawn where it all started.
Big THANKS and HUGS to Kelly for organizing the hop!
This drive is quite near and dear to my heart. I love it! I love creating cards in the hope that they will bring a smile to some kids faces. I love that I can send a tiny piece of love all wrapped up in an envelope for a few pennies. So, that said, if 1 card is good, 4 are even better. Here are a few I am sending along on this round.

Supplies: White card stock, Hero Arts Friend definition stamp inked with fired brick Distress ink by Ranger, Girl, frog and fly stamps: Basic Grey colored with Prismacolor pencils, patterned paper MME Home collection, sentiment Hero Arts

Supplies:Bear die cut from Create a Critter cartridge from Provo Craft, Blue card stock DCWV Citrus collection embossed with tiny mosaic folder by Cuttlebug, patterned paper Prima Marketing Rock Out Bro collection, Prima flower with custom brad made with the i- top, sentiment on brad by Hero Arts, friends forever stamp by Technique Tuesday .

Admittedly, this card looks like it is having a bad hair day..... I should have taken a bit more care in primping but I still like it's wild and crazy way!
Supplies: Bazzil card stock, stamp: Me & My Big Ideas, copic markers, background stamp Technique Tuesday, sentiment Hero Arts, eyelets, ribbon: Offray

I think this one is my favorite. It is a variation of a card I did at Valley Forge with Technique Tuesday.
Supplies: Bazzill card stock, patterned strips white card stock inked with Ranger Distress Inks in wild honey, dried marigold and crushed olive, what's hiding under the bed and monster stamps by Recollections, hounds tooth stamp by Technique Tuesday stamped with rich cocoa ink by Memento, copic markers.
Thursday, August 12, 2010
Projects from Creating Keepsakes Convention, Valley Forge
After a super packed, hectic two days in Valley Forge at the CK Convention, my computer was out of commission with a virus. It is back up, albeit slow, but it is working ...so before it is time for next year's convention, I wanted to post a few photos.
I took a lot of really good classes, but because the time is condensed, only finished a portion of the projects . The upside to that is you come home with goody bags of lovely things to finish. So finish I did, then they were such happy projects, they wanted to be photographed and shared.
Picture 1: I think my favorite project class was the Technique Tuesday Top Tips for Tantalizing Cards....oh my, these cards were truly wonderful, and I will definitely be making them again.
Picture 2: The Magic Moments class had all the pretty colors, with those really beautiful flowers with the gigantic brads for centers.
Picture3: Six FAB layouts were completed in the Latest and Greatest with Basic Grey.
Picture 4: All the loot. Mostly Basic Grey Paper Packs, Technique Tuesday grab bags and tiles ( both discounted at the crop), Tattered Angels mat, screens and Glimmer Mist in Pomegranate ( LOVE), a couple Cricut cartridges , and of course distress inks because, really now, what is the point of shopping if there isn't some Tim Holtz involved somewhere?


I took a lot of really good classes, but because the time is condensed, only finished a portion of the projects . The upside to that is you come home with goody bags of lovely things to finish. So finish I did, then they were such happy projects, they wanted to be photographed and shared.
Picture 1: I think my favorite project class was the Technique Tuesday Top Tips for Tantalizing Cards....oh my, these cards were truly wonderful, and I will definitely be making them again.
Picture 2: The Magic Moments class had all the pretty colors, with those really beautiful flowers with the gigantic brads for centers.
Picture3: Six FAB layouts were completed in the Latest and Greatest with Basic Grey.
Picture 4: All the loot. Mostly Basic Grey Paper Packs, Technique Tuesday grab bags and tiles ( both discounted at the crop), Tattered Angels mat, screens and Glimmer Mist in Pomegranate ( LOVE), a couple Cricut cartridges , and of course distress inks because, really now, what is the point of shopping if there isn't some Tim Holtz involved somewhere?
I also took a class on Digital Photography with Candice Stringham, one of my favorite photographers who used to write all the photography articles for Creating Keepsakes but now works with Jessica Sprague, Digital Goddess over at :http://www.jessicasprague.com/ Wow, did I learn a lot in that one hour. Her class was the one in which I gained the most knowledge.
Even though the conventions are wild and crazy, and you never feel like there is enough time for everything,I highly recommend going if you get the chance.


Subscribe to:
Posts (Atom)